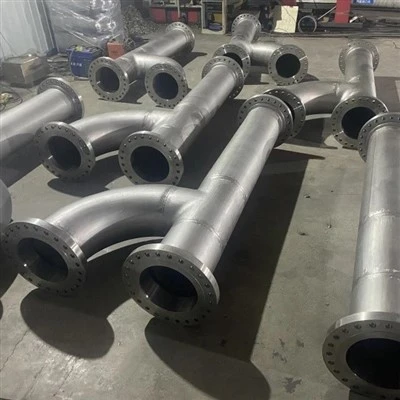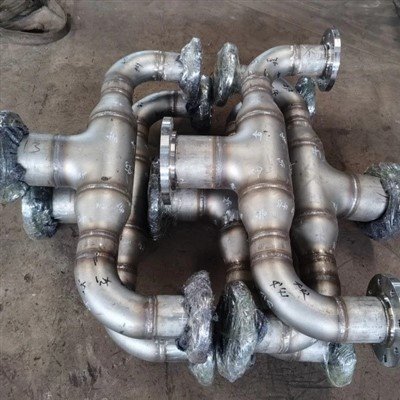
An unpurged weld root on stainless steel or nickel alloy pipe is one of the most common - and most expensive - causes of field rejections. When the inside of a joint is exposed to air during welding, oxygen and nitrogen react with the hot, chromium-rich metal and strip away the thin oxide layer that gives the alloy its corrosion resistance.

The result is a rough, discolored, often flaking layer known as "sugaring," and a joint that fails hydrotest, PMI, or corrosion qualification. Back purging prevents this by flooding the pipe interior with inert gas before and during welding, but getting it right depends on choosing the correct method and calculating a flow rate and purge time that actually clear the pipe of air without introducing turbulence. This guide compares the main back purging techniques used in stainless steel and nickel alloy pipe fabrication and walks through the volume-exchange math used to size purge flow rates correctly.
|
Back purging is the practice of filling the inside of a stainless steel or nickel alloy pipe joint with an inert gas - almost always argon - to keep residual oxygen below a target threshold (typically 100 ppm for standard austenitic grades and as low as 25–50 ppm for duplex and nickel alloys) so the weld root does not oxidize. The correct purge flow rate is calculated from the internal volume of the purge zone, the number of full volume exchanges required (typically 4–10), and the desired purge time, using Q = (V × N) / t. |
What Is Back Purging and Why Does It Matter for Stainless Steel Pipe Welds?
|
Back purging protects the underside (root) of a stainless steel or nickel alloy weld from atmospheric oxidation by displacing air inside the pipe with inert gas, which preserves the alloy's chromium oxide passive layer and the corrosion resistance and mechanical properties that layer provides. |
Gas tungsten arc welding (GTAW) and similar processes shield the top of the weld pool with a torch gas, but the underside of an open-root joint is exposed to whatever atmosphere is inside the pipe. Austenitic stainless steels (304/316), duplex and super duplex grades, and nickel alloys such as Inconel 625 and Hastelloy C276 all rely on a thin, self-healing chromium oxide film for corrosion resistance. At welding temperatures, that film is destroyed, and if oxygen and nitrogen are present inside the pipe, a new, defective oxide layer forms on the root - visible as straw, blue, or black-gray discoloration, and in severe cases as a brittle, scaly "sugared" surface.
Sugared roots reduce corrosion resistance at exactly the location most exposed to process fluid, and they create stress risers that can initiate cracking in cyclic or corrosive service. This is why back purging is a mandatory step - not an optional refinement - for any code-governed stainless or nickel alloy pipe weld, and why fabrication specifications and inspection criteria such as the AWS D18.2 discoloration reference chart, ASME BPE for high-purity systems, and NACE MR0175/ISO 15156 for sour service all reference acceptable root oxidation levels.
Which Back Purging Method Should You Use - Dam (Plug) Purging or Continuous Flow-Through Purging?
|
Use dam (plug) purging for isolated joints, spool fabrication, and repair welds where the purge volume needs to be minimized and purge time kept short; use continuous flow-through purging for long straight runs, orbital tube welding, and situations where the whole line can be swept from one open end to a vent at the other. |

Dam purging isolates a small volume around the joint using removable dams placed inside the pipe on both sides of the weld, so only that limited section needs to be purged - which shortens purge time and reduces gas consumption significantly compared with purging an entire spool. Flow-through purging, by contrast, treats the whole pipe or fabricated assembly as one purge volume, feeding gas in at one end and venting displaced air out the other; it needs no dams but takes longer and uses more gas as pipe length or complexity increases. A third variant, chamber or tent purging, encloses the joint area (or an entire fitting, elbow, or tee) in a flexible enclosure and is typically used where dams cannot be positioned, such as complex branch connections.
|
Method |
Best Use Case |
Purge Volume |
Typical Purge Time |
Equipment Needed |
|
Dam (plug) purging |
Single joints, spool fab, field tie-ins |
Low - limited to space between dams |
Short (minutes) |
Water-soluble or inflatable dams, purge hose |
|
Continuous flow-through |
Long straight runs, orbital tube welding |
High - entire pipe/spool |
Long (many minutes to hours) |
Inlet/outlet fittings, flow meter, O₂ analyzer |
|
Chamber / tent purging |
Complex fittings, tees, branch connections |
Moderate - enclosure volume |
Moderate |
Flexible enclosure, sealing tape, purge hose |
Selection generally comes down to geometry and repeatability: shop spool fabrication with many short joints favors dams for speed, while cross-country pipeline tie-ins and orbital tube-to-tube welds typically use flow-through purging because there is no practical way to insert dams.
How Do You Calculate the Purge Gas Flow Rate for a Given Pipe Diameter?
|
Purge flow rate is sized from the internal volume of the purge zone, divided by the target purge time, multiplied by the number of full volume exchanges needed - expressed as Q = (V × N) / t - and it should be kept low enough that gas moves through the pipe in a smooth, laminar front rather than a turbulent, mixing flow. |
The starting point is the internal volume of the section being purged:
V = π × (ID / 2)² × L
where ID is the pipe's internal diameter and L is the length of the purge zone (the distance between dams, or the full spool length for flow-through purging). Once the volume is known, the required flow rate follows directly from the target purge time and the number of volume exchanges needed to reach a safe oxygen level:
Q = (V × N) / t
Q is the flow rate, V is the purge-zone volume, N is the number of full volume exchanges (commonly 4–10, discussed in the next section), and t is the target purge time. Worked example: a 6-inch schedule 40 pipe has an internal diameter of about 154 mm. Over a 3-metre dammed section, the purge volume is V = π × (0.077 m)² × 3 m ≈ 0.056 m³, or roughly 56 litres. To achieve 6 full volume exchanges within an 8-minute purge, the required flow rate is Q = (56 L × 6) / 8 min ≈ 42 L/min.
In practice, most procedures use a two-stage flow: a higher initial flow rate to sweep out the bulk of the air quickly, followed by a much lower "holdback" flow - often only 5–15 L/min for small-bore pipe - maintained during welding to hold a slight positive pressure without disturbing the already-purged atmosphere. Flow rate should never be pushed so high that gas velocity becomes turbulent; turbulence re-entrains the air the purge is trying to remove and can also blow out dams, so procedures typically target a low, steady velocity rather than the fastest possible fill.
How Many Pipe Volume Exchanges Are Needed to Reach a Safe Oxygen Level?
|
Reaching a residual oxygen level below roughly 100 ppm under laminar purge conditions typically requires 5 to 8 full volume exchanges; tighter targets in the 25–50 ppm range for duplex and nickel alloys, or below 10 ppm for high-purity systems, generally call for 8 to 12 exchanges plus a short stabilization soak before welding starts. |

Displacing air from a pipe is not a one-for-one swap - the incoming purge gas mixes with the remaining air near the front of the flow, so each additional volume exchange removes a progressively smaller share of the oxygen that is left. This is why oxygen concentration falls quickly during the first few exchanges and then drops much more slowly, and why simply calculating a purge time from volume and flow rate is not a substitute for confirming the actual oxygen level with a calibrated oxygen analyzer at the vent or weld root before striking the arc.
|
Approx. Volume Exchanges |
Typical Residual O₂ (well-purged, laminar flow) |
Suitable For |
|
2–3 |
1,000–5,000 ppm |
Not adequate for stainless - visible sugaring likely |
|
4–6 |
100–500 ppm |
General austenitic stainless (light straw color) |
|
6–8 |
50–100 ppm |
Bright-finish austenitic stainless, standard duplex |
|
8–12 |
10–50 ppm |
Super duplex, nickel alloys, corrosion-critical service |
|
12+ |
Below 10 ppm |
High-purity / pharmaceutical / semiconductor (ASME BPE) |
These figures are representative, not guaranteed - dead legs, valves, sample ports, and poor dam seals all reduce real-world purge efficiency versus the theoretical dilution model, which is exactly why oxygen monitoring, not exchange count alone, is the basis for release-to-weld decisions on corrosion-critical work.
What Oxygen Content Should You Target Before Striking the Arc, by Alloy Family?
|
Target residual oxygen generally tightens as alloy content increases: roughly 50–100 ppm is acceptable for standard 300-series austenitic stainless, 25–50 ppm for duplex and super duplex grades to protect the nitrogen balance and phase ratio, 25–30 ppm for nickel alloys such as Inconel 625 and Hastelloy C276, and below 10 ppm for high-purity pharmaceutical or semiconductor piping. |
The AWS D18.2 discoloration reference chart correlates visible root-side oxide color with approximate oxygen concentration and is widely used as a practical field check: a bright, silver or light straw root generally corresponds to a well-purged joint, while blue, purple, gray, or black coloration signals oxygen levels high enough to have already degraded the surface.
Duplex and super duplex grades need a somewhat tighter oxygen limit than standard austenitic stainless not only to avoid discoloration but because excess oxygen at the root can disturb the ferrite-austenite balance and nitrogen retention that give duplex steels their strength and corrosion resistance. Nickel alloys, with their higher chromium and molybdenum content, are similarly sensitive, and high-purity systems built to ASME BPE add a mirror-finish requirement on top of the oxygen limit.
|
Alloy Family |
Typical Target O₂ |
Reference Color (AWS D18.2) |
Notes |
|
300-series austenitic (304/316/321) |
50–100 ppm |
Light straw to none |
Standard structural and process piping |
|
Duplex / super duplex (2205/2507) |
25–50 ppm |
Light straw or better |
Protects ferrite/austenite balance and nitrogen retention |
|
Nickel alloys (625, C276, 825) |
25–30 ppm |
Light straw or better |
Higher Cr/Mo content increases sensitivity |
|
High-purity / pharma / semiconductor |
Below 10 ppm |
No visible color, mirror finish |
Per ASME BPE and project specification |
Argon vs. Nitrogen vs. Argon-Hydrogen
|
Argon is the default and safest choice for back purging most stainless steel and nickel alloy welds; nitrogen is a lower-cost option acceptable for standard austenitic grades but should not be used on duplex, super duplex, or nitrogen-sensitive nickel alloys; argon-hydrogen blends improve root brightness on austenitic stainless but are prohibited on duplex and hydrogen-susceptible nickel alloys. |

Argon is fully inert, denser than air (which helps it settle and hold in horizontal pipe sections), and compatible with essentially every stainless and nickel alloy grade, which is why it is the default purge gas specified on most welding procedure specifications. Nitrogen costs less and is widely available, and it purges standard austenitic stainless steel effectively, but it is not inert with respect to nitrogen-controlled duplex and super duplex grades, where uncontrolled nitrogen pickup at the root can alter the intended phase balance; it is also unsuitable for several nickel alloys where nitrogen can promote unwanted nitride formation.
Argon-hydrogen blends, typically 2–5% hydrogen, produce a brighter, more oxide-free root on austenitic stainless and can shorten purge time slightly, but the hydrogen introduces a real embrittlement risk on duplex, super duplex, and certain precipitation-hardened or high-strength nickel alloys, so its use should be confirmed against the specific WPS and material specification before selection.
|
Purge Gas |
Relative Cost |
Compatible Alloys |
Key Risk / Limitation |
|
Argon (100%) |
Moderate |
All stainless steels and nickel alloys |
None significant - default choice |
|
Nitrogen |
Low |
Standard 300-series austenitic stainless |
Alters phase balance in duplex; unsuitable for some nickel alloys |
|
Argon-hydrogen (2–5% H₂) |
Moderate-high |
Austenitic stainless only |
Hydrogen embrittlement risk on duplex and susceptible nickel alloys |
How Should Purge Dams Be Positioned, and What Materials Should You Use?
|
Position dams close enough to the joint - typically 100–150 mm (4–6 in) on each side - to minimize the volume that needs purging while leaving room for gas inlet and vent paths, and choose dam material based on the application: water-soluble paper dams for single-pass shop welds, inflatable rubber dams for reusable field joints, and shaped foam or high-temperature tape for irregular fittings. |
Dam placement is a direct trade-off: moving dams closer to the joint reduces purge volume and therefore purge time, but leaves less room for the inlet and vent to establish smooth, non-turbulent flow across the weld root. A practical starting point is 100–150 mm from the joint on each side for small and mid-diameter pipe, adjusted upward for larger diameters where flow needs more distance to stabilize.
Water-soluble paper dams are common for shop spool fabrication because they dissolve and wash out after welding, leaving no removal step; inflatable rubber dams are reusable and well suited to field tie-ins where the same equipment purges many joints; and for tees, reducers, and other irregular geometries, shaped foam blocks or high-temperature purge tape are used to seal around the fitting's internal profile. In every case, the vent must be sized to relieve pressure without allowing so much outflow that the dam is pulled loose - dam failure mid-weld is one of the most common causes of a purge losing its atmosphere partway through a joint.
What Are the Most Common Back Purging Mistakes That Cause Sugaring or Weld Defects?
|
The most frequent causes of root oxidation are starting the weld before the purge has stabilized, setting flow rate too high (causing turbulent air re-entrainment), dam or seal leaks, and welding without a vent path that lets displaced air and excess gas escape. |

Welding before the target oxygen level is confirmed - relying on a fixed purge time instead of an actual oxygen reading.
Flow rate set too high, creating turbulent flow that re-mixes air back into the purge zone instead of pushing it out ahead of the gas front.
Leaking or improperly seated dams, especially at flanges, valves, or branch connections where the internal profile is irregular.
No vent, or a vent that is too small, causing pressure buildup that can blow out a dam or distort thin-wall pipe.
Switching purge gas type without checking alloy compatibility, particularly using nitrogen or argon-hydrogen blends on duplex or nickel alloy joints.
Failing to hold a low steady "holdback" flow during welding, allowing outside air to diffuse back into the purge zone over a long multi-pass weld.
Frequently Asked Questions
Q: What is the minimum purge time for stainless steel pipe welding?
A: There is no universal minimum time - purge time depends on purge-zone volume, flow rate, and target oxygen level, and should be calculated with Q = (V × N) / t and then confirmed with an oxygen analyzer rather than applied as a fixed rule of thumb.
Q: Can nitrogen be used instead of argon for back purging?
A: Nitrogen is acceptable for standard 300-series austenitic stainless steel but should be avoided on duplex, super duplex, and nitrogen-sensitive nickel alloys, where uncontrolled nitrogen pickup can affect phase balance or metallurgy.
Q: What oxygen level is acceptable before welding stainless steel pipe?
A: Most fabrication specifications target 50–100 ppm for standard austenitic stainless, tightening to 25–50 ppm for duplex and nickel alloys and below 10 ppm for high-purity systems; the applicable project specification and WPS govern the exact figure.
Q: Why does the weld root turn blue or black even with a purge running?
A: Discoloration indicates the purge did not reach a low enough oxygen level before or during welding - common causes are insufficient purge time, a leaking dam, flow rate set too high, or starting the arc before the atmosphere stabilized.
Q: Does back purging flow rate need to change during welding?
A: Yes - most procedures use a higher initial flow rate to sweep out air quickly, then reduce to a much lower holdback flow during welding to maintain a slight positive pressure without introducing turbulence.
Q: Is back purging required by code, or is it a recommended practice?
A: Requirements are set by the governing code, specification, or WPS rather than being universal - many piping and pressure-boundary applications for stainless and nickel alloy pipe require it, and acceptance criteria are commonly referenced against the AWS D18.2 discoloration chart or a project-specific oxygen limit.